briefing

Just Sharing healthy foods for little ones from 9mo~3yo++
blog started on 17/3/2015


Thursday, February 25, 2016

25/2/2016 (Thu) 免揉奶酪酥麵包條

Sorry for rarely posts recently as my mobile phone is not functioning well... On and Off by itself, couldn't restart in short time...
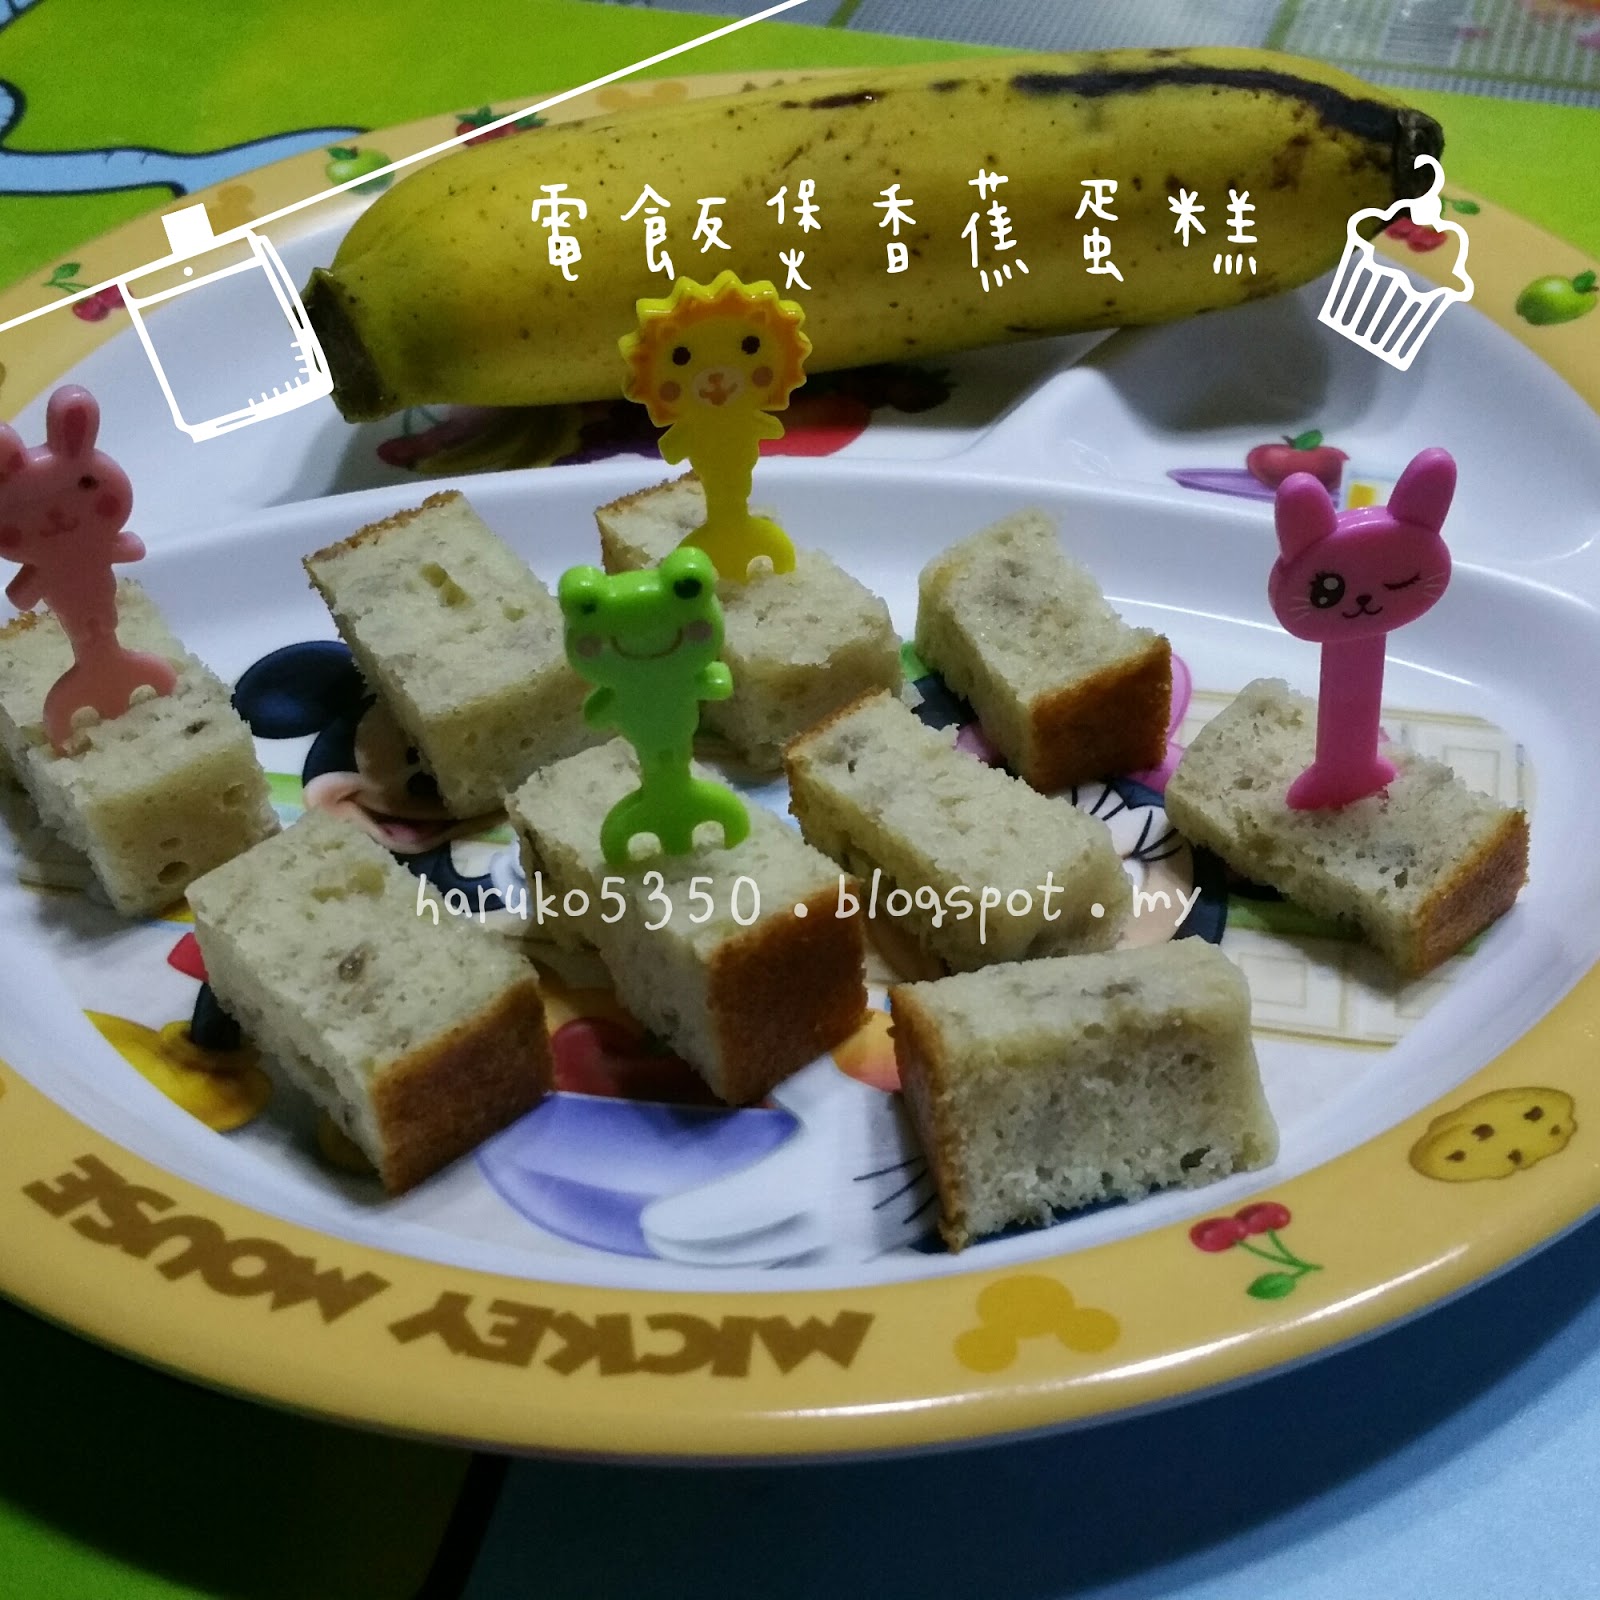
Meals of the day for my 31mo little princess.. ^.^


knead-less Cheese Bread Sticks  
Ingredients
150g Milk
200g high protein flour
100g wholemeal flour
40g muscovado sugar or any sugar
40g milk powder
1 egg
1 tsp instant dry yeast
35g unsalted butter (room temperature) / olive oil

For Topping:

grated cheddar cheese
olive oil / rice bran oil

Steps:

1) mix all ingredients in a big bowl. Mix till combine and soft dough is formed (I spent less than 1 min)
2) cover bowl with cling wrap, leave a small hole for air flow.
3) keep in the fridge 2 hours onwards, after 2 hours, you may take out and shape any time.
4) take out the wet dough and place on a greased mat, I use some oil to grease my hands too.
P/s: If you do not wish to make too many bread sticks at once, you may divide the dough into 3 portions and keep 2 portions in the freezer for next use within 1 week
5) Roll and form dough into rectangular shape, brush a layer of olive oil on the dough surface, then fold in 1/3 of the dough and fold again (pic 1). Repeat rolling flat and fold again. (pic 1)
6) Cover dough with cling wrap, rest for 10 minutes. After that, roll dough into 3mm flat dough, use knife to cut out 1cm width sticks. (pic2) 
7) coat each sticks with grated cheddar cheese, use fingers to slightly adjust the cheese till evenly. Place the bread sticks on non-stick sheet laid on baking tray.
8) put the baking tray inside the oven (power off) and let it proof for 30mins. You may place a bowl of hot water inside the oven to help the proofing process better.
9) after 25mins, Remove the baking tray from the oven. Pre-heat the oven at 190'C for 5 mins.
10) Bake the bread sticks for 10 minutes, remove tray, change tray direction and put again on the top rack in the oven, bake for another 1-2 minutes or till light golden brown.

P/S: This morning after taking out the 1/3 of the dough made yesterdaydge, after 10 mins, I divided the dough into 3 portions. 1 portion made into 6 mini sized bun + 2 cheese sticks and 2 portions kept in the freezer for next use within 1 week.


圖1 / pic1


圖2 / pic2


圖3 / pic3

免揉奶酪酥麵包條


材料:牛奶150g,速發乾酵母1小匙,高筋麵粉200g,全麥麵粉100g, 有機蔗糖/細砂糖40克,奶粉40克,雞蛋1顆,無鹽奶油35g(可用橄欖油替代)

準備:
切達奶酪絲適量
橄欖油/米糠油適量

做法:
1. 奶油放室溫軟化
2. 將所有材料放入鋼盆內攪拌均勻
3. 放入樂扣盒中但不要蓋緊,讓空氣可進入
4. 放入冷藏兩小時到一天,隨時都可以拿出來整形(冷藏越久甜味越淡)
5. 將冰箱中的麵糰拿出來整型,麵糰很溼軟,可以多撒些麵並在桌子上抹油,也在雙手抹些油。
(如果不想一次做太多的分量,可以把麵團分成3份。然後把另2份存放在冷凍庫,以便在1週內使用。)
6. 把麵糰擀成長方形,抹上一層橄欖油,然後對折麵團(如圖1),再擀平,再重複對折麵糰(如圖1)。
7. 用保鮮紙覆蓋,休麵糰10分鐘。然後把麵團擀平成3厘米薄,用刀切成1公分的細條。 (如圖2)
8. 將切好的細條沾上奶酪絲,用手稍微整理均勻後擺放在烤盤上,如果細條較短/較厚,可以用手慢慢的抻長一些。 (如圖3)
9. 把烤盤和一碗熱水一起送進沒開電源的烤箱裡發酵約30分鐘或至雙倍大。
10. 把烤盤和熱水取出烤箱,開啟烤箱電源預熱190度C。
11. 放入已經預熱至190度c的烤箱中(中層),烘烤10分鐘,取出烤盤轉換方向,再放入烤箱最上層,繼續烘烤1-2 分鐘至表面上色​​即可。


備註:今早從冰箱裡取出麵團後,休麵團 10分鐘後,我把麵團分成3份。 1份做成6個迷你的小麵包+2條麵包棒和把另2份存放在冷凍庫,以便在1週內使用。


蒜炒蝦子意大利面
材料:
意大利面(熟)2小碗
蒜米2-3瓣
蝦子6尾(剝殼去腸泥)
白玉菇適量
橄欖油1湯匙
乾香菜適量
大蒜粉適量
海鹽適量

做法:
1.意大利面放進沸水煮熟
2.煮意大利面的同時把蒜米切碎備用
3.蝦剝殼去腸泥
4.用小火熱鍋然後倒入一湯匙橄欖油然後炒爆香蒜蓉至金黃色
5.然後加蝦肉和白玉菇略炒加入海鹽
6.加入煮好的意大利面翻炒均勻後加適量的胡椒粉和乾香菜提香
7.翻炒均勻就可上碟享用啦~

Fussili Aglio e Olio
Ingredients:
1 baby bowl cooked spaghetti
2 Prawns
2 quail eggs (hard boiled)
8 shimeiji mushroom 
2 cloves garlic (sliced)
1 tbsp olive oil
some dried parsley
some garlic powder
sea salt a little bit

Steps:
1) sauteed garlic with the olive oil
2) add in small prawns and mushroom to stir fry for a while
3) sprinkle some salt
4) add in cooked spaghetti to stir fry for a while
5) add in dried parsley and garlic powder
6) stir fry mix well and DONE


24/2/2016 (wed)


knead-less Cheese Bread Sticks  
Ingredients
150g Milk
200g high protein flour
100g wholemeal flour
40g muscovado sugar or any sugar
40g milk powder
1 egg
1 tsp instant dry yeast
35g unsalted butter (room temperature) / olive oil

For Topping:
grated cheddar cheese
olive oil / rice bran oil

Steps:
1) mix all ingredients in a big bowl. Mix till combine and soft dough is formed (I spent less than 1 min)
2) cover bowl with cling wrap, leave a small hole for air flow.
3) keep in the fridge 2 hours onwards, after 2 hours, you may take out and shape any time.
4) take out the wet dough and place on a greased mat, I use some oil to grease my hands too.
P/s: If you do not wish to make too many bread sticks at once, you may divide the dough into 3 portions and keep 2 portions in the freezer for next use within 1 week
5) Roll and form dough into rectangular shape, brush a layer of olive oil on the dough surface, then fold in 1/3 of the dough and fold again (pic 1). Repeat rolling flat and fold again. (pic 1)
6) Cover dough with cling wrap, rest for 10 minutes. After that, roll dough into 3mm flat dough, use knife to cut out 1cm width sticks. (pic2) 
7) coat each sticks with grated cheddar cheese, use fingers to slightly adjust the cheese till evenly. Place the bread sticks on non-stick sheet laid on baking tray.
8) put the baking tray inside the oven (power off) and let it proof for 30mins. You may place a bowl of hot water inside the oven to help the proofing process better.
9) after 25mins, Remove the baking tray from the oven. Pre-heat the oven at 190'C for 5 mins.
10) Bake the bread sticks for 10 minutes, remove tray, change tray direction and put again on the top rack in the oven, bake for another 1-2 minutes or till light golden brown.

P/S: This morning after taking out the dough from the fridge, after 10 mins, I divided the dough into 3 portions. 1 portion made into 6 mini sized bun + 2 cheese sticks and 2 portions kept in the freezer for next use within 1 week.


圖1 / pic1


圖2 / pic2


圖3 / pic3


免揉奶酪酥麵包條

材料:牛奶150g,速發乾酵母1小匙,高筋麵粉200g,全麥麵粉100g, 有機蔗糖/細砂糖40克,奶粉40克,雞蛋1顆,無鹽奶油35g(可用橄欖油替代)

準備:

切達奶酪絲適量
橄欖油/米糠油適量

做法:
1. 奶油放室溫軟化
2. 將所有材料放入鋼盆內攪拌均勻
3. 放入樂扣盒中但不要蓋緊,讓空氣可進入
4. 放入冷藏兩小時到一天,隨時都可以拿出來整形(冷藏越久甜味越淡)
5. 將冰箱中的麵糰拿出來整型,麵糰很溼軟,可以多撒些麵並在桌子上抹油,也在雙手抹些油。
(如果不想一次做太多的分量,可以把麵團分成3份。然後把另2份存放在冷凍庫,以便在1週內使用。)
6. 把麵糰擀成長方形,抹上一層橄欖油,然後對折麵團(如圖1),再擀平,再重複對折麵糰(如圖1)。
7. 用保鮮紙覆蓋,休麵糰10分鐘。然後把麵團擀平成3厘米薄,用刀切成1公分的細條。 (如圖2)
8. 將切好的細條沾上奶酪絲,用手稍微整理均勻後擺放在烤盤上,如果細條較短/較厚,可以用手慢慢的抻長一些。 (如圖3)
9. 把烤盤和一碗熱水一起送進沒開電源的烤箱裡發酵約30分鐘或至雙倍大。
10. 把烤盤和熱水取出烤箱,開啟烤箱電源預熱190度C。
11. 放入已經預熱至190度c的烤箱中(中層),烘烤10分鐘,取出烤盤轉換方向,再放入烤箱最上層,繼續烘烤1-2 分鐘至表面上色​​即可。


備註:今早從冰箱裡取出麵團後,休麵團 10分鐘後,我把麵團分成3份。 1份做成6個迷你的小麵包+2條麵包棒和把另2份存放在冷凍庫,以便在1週內使用。


Brown Rice Spinach Pancake 
Ingredients :
1 bowl of cooked brown rice (children's bowl)
1 egg 
40g cooked pumpkin puree
1 bowl of baby spinach (children's bowl, chopped)
Dash of pepper powder 
pinch of salt

Steps:
1) mix well all ingredients and scoop a tbsp mixture onto non stick pan and panfry till both sides are cooked.


Apple Beetroot Soup
Ingredients:
1 apple
1 onion
1 beetroot
1 chicken tight

Pear Luo Hon Guo Drinks
Ingredients
1 Luo Hon Guo
1 golden pear
handful of dried winter melon
1 honey date
2-3 litres water


Tuesday, February 23, 2016

優格夾心蛋糕 22/2/2016

由於手機還沒有修好,每次上傳或編輯食譜都很麻煩。我的手機呀,幾時會修好呀?
寶寶在過年期間,每天都要吃柑。老闆買了一箱11公斤的皇帝桔給我們每個員工,味道非常好吃,小巧又可愛。我的寶貝喜歡得不得了,每天都吵吃。有時趁媽媽不注意還偷吃呢。 。 。

寶貝雖然咳了傷風了,還好媽媽勤力幫寶寶搽精油,讓寶寶服食白藜蘆醇,給寶寶燉雪梨。寶寶在3天裡就痊癒了,不用吃藥。 。呵呵呵。 。 (我家寶寶很少很少吃藥的。。。連看醫生也非常少,打預防針除外。。)


優格夾心蛋糕
材料:
( A): 40克全脂優格
                20毫升米糠油/橄欖油/玉米油/任何菜油
                2顆 蛋黃
                50克 低筋麵粉/蛋糕粉/普通麵粉/中筋麵粉
       
(B ) : 3顆 蛋白
                 15克 有機蔗糖/白砂糖
                 1/2茶匙 檸檬汁/醋

夾心料:
商店買的無糖果醬/花生醬
或者任何果醬/花生醬(自製/買的)
夾心可以多變哦。。果醬,花生醬,蕃薯泥,乳酪醬,等等都可以的。

做法:
1 )材料(A )混合後,備用。
2 )預熱烤箱160'C度。
3 )材料(B )打至濕性發泡後,再將打發的蛋白分兩次倒入( 1 )拌勻。
4)把麵糊舀入擠花袋/塑膠袋,底部剪個小洞,擠麵糊到不粘烤紙/布上/矽膠墊 (超級給力也环保可重复使用),輕輕地擠成35-40mm圓狀。 (好像馬卡龍那般^.*) 擠好後,可以用手指稍微抹平凸/尖的表面。
5)把烤盤送進烤箱,烤20分鐘或表皮呈淺棕色。
6)把蛋糕移去鋼絲鐵架上待冷卻。
7)在蛋糕底部塗抹一層薄薄的果醬然後夾上另一片蛋糕黏在一起。


擠麵糊示範/Demo on squeezing the batter

Yogurt Soft "PANCAKE" with Jam
Ingredients:
Egg Yolk Batter:
2 Egg Yolks
20ml Grapeseed Oil/any vege oil
40g natural plain yogurt
50g Cake Flour / all purpose flour

Meringue:
3 Egg Whites
15g castor sugar
few drops vinegar/lemon juice

Filling:
Some fruit jam / peanut butter (homemade/store bought)

Steps:
1) Preheat oven to 160'C.
2) Place a parchment paper or non-stick baking sheet on the baking tray.
3) In a mixing bowl, add in egg yolk, oil and yogurt, mix well then add in flour and mix till combined. Set aside.
4) Place the egg whites and vinegar/lemon juice into a clean bowl and whisk till bubbly then add in sugar by 2 portions. Continue whisking until soft peaks form, approximately 2 minutes.
5) Transfer 1/3 of the egg whites to the egg yolk batter and mix well. Add the remaining egg whites and fold in gently. 
6) Pour batter into a piping bag (no need nozzle) or plastic bag, cut small hole at the edge and gently squeeze out batter onto the parchment paper (just like making macarons ^.*)
7) Bake for 20mins or light golden brown on the surface.
8) Place the pancake on the wire rack for cooling down.
9) Spread a thin layer of jam / peanut butter on one side of the pancake then place another pancake and fix together.


Wednesday, February 17, 2016

17/2/2016 (wed) 自製薯片

自製薯片
材料:
80克馬鈴薯泥 (連皮蒸/水煮都可以)
1 顆蛋黃
50克 太白粉
5克無鹽奶油(橄欖油:1歲以下)
10克 有機蔗糖

做法:
1)首先蒸熟或煮熟一粒大的​​​​​​馬鈴薯,待涼後,稱出所要的重量,壓泥。
2)把馬鈴薯泥,奶油/橄欖油, 蔗糖和蛋黃加入攪拌器/用料理棒,攪拌幼滑。
3) 加入太白粉,用湯匙攪拌均勻就可以了。(圖1)
4) 把麵糊倒入一個膠袋子裡,剪個小洞。(圖2)
5)在不沾黏烤紙上擠出大約1公分的小團,間隔大約5-6公分的空間,再擠出麵糊。 (圖3)
6)取另外一張不沾黏烤紙,覆蓋在擠出的麵糊上面(圖4)
7)用手指輕壓在每一個麵糊上面,然後用一個底部平坦的碗/東西,壓在每一個麵團上面。(圖5) (我用的是砂鍋碗,我只是放在每一個麵團上面而已,碗的重量自然地壓平麵團,我並沒有用力壓)
8) 送進已經預熱的烤箱160'C, 烤5分鍾, 然後取出烤盤,輕取上面那張不沾黏烤紙(圖6)
9)繼續烘烤5-8分鐘;或看見餅乾邊緣開始上色即可。(圖7)
10)重複做法5-9直到所有麵糊烤完。


小貼示:本人比較喜歡一次性把3-4條的番薯/馬鈴薯連皮放進熱水里煮熟。然後,稍微涼一些時就去皮壓泥,收在幾個拉鍊鎖袋,壓成扁扁的,收進冷凍庫。 (如圖下)每次需要用時,就很容易解凍,因為很薄。由於煮1條番薯用15分鐘的煤氣,煮4條番薯也是用15分鐘的煤氣。能省就省吧~


(圖1)

(圖2)

(圖3)

(圖4)

(圖5)

(圖6)


(圖7)

Potato Chips
Ingredients:
80g potato puree ( steamed/boiled)
1 egg yolk
50g potato starch
5g unsalted butter
10g organic cane sugar

Steps:
1) boil 1 medium size sweet potato (with skin on) in water, cook for 15mins or till can be poked in by fork. (you may skip this if you have frozen mashed sweet potato as I always do) Peel and mash the sweet potato with a fork.
2) in the mixing cup, add in sweet potato, egg yolk, sugar and butter. Use hand blender / blender to blend them till smooth
3) add in potato starch and stir well, then transfer it into a plastic bag, cut a hole at the edge (5mm size) then start squeezing the batter (about 1 cm pile size) on parchment paper/non stick baking sheet , squeeze another with large gap (about 2 inches) between batter
4) place another sheet of parchment paper / non stick baking sheet to cover the squeezed batters
5) use you hand gently press on each batter, then use a flat bottom surface bowl or anything to press the batters gently. ( as I am using a casserole bowl, I just put the bowl on top of each batter, they are nicely pressed down with the bowl weight, I didn't use any force)
6) bake at preheated oven of 160'C for 5 mins, remove baking tray from oven. Gently remove the top parchment paper/non stick baking sheet.
7) return the baking tray to the oven and continue baking for 5-8 mins or till the sides start turning brown.


Thursday, February 11, 2016

11/2/2016 初四 迷你花生杏仁餅

花生杏仁餅
材料:
特幼麵粉/低筋麵粉 50克
米糠油(或任何菜油) 15克
無糖花生醬 30克
杏仁粉 40克
有機蔗糖 10克

表面:
蛋黃 適量

做法:
1) 把所有材料稱好,所有粉類一過篩備用。
2)在一個大碗裡,加入花生醬,杏仁粉,米糠油和蔗糖,攪拌均勻。
3)過篩的粉類分2次加入,以橡皮括刀括壓盆底的方式混合成散狀,最後用手直接捏壓成糰。
4)把麵團分成大約4克的小圓團。
5)用手心稍微搓揉成圓圓的小球,間隔排放在烤盤中,表面刷上蛋黃。
6)放入已經預熱到145度C的烤箱中層烘烤20分鐘,然後取出烤盤,轉換方向,再放入烤箱最高的架,繼續烤5分鐘至稍微上色即可。
7)待涼後收進罐子。


Wednesday, February 10, 2016

10/2/16 CNY day3 免揉免發無蛋麵包

免揉免發無蛋麵包
材料:
300克 普通麵粉
110克 原味無糖優格
85克 熟馬鈴薯泥 (也可換成80克南瓜泥)
30克 有機糖蜜 (任何糖也可)
1 茶匙 乾酵母
15克 鮮奶
1 湯匙 橄欖油

做法:
1) 把所有材料,除了橄欖油,完全攪拌均匀。
2) 加入橄欖油,再次拌匀,揉成光滑即可。(大概1-2分鐘而已)
3)将麵糰揉成圓型或椭圓型或放入麵包模具,然後放入鍋裏隔着温水蓋着休麵10分鐘(不需要開火)。
4) 取出,放進已經預熱的烤箱,以190度烤20分鐘即可出爐咯~


很多人會問,免揉就是不需要搓揉嗎? 
其實,是需要搓揉但是不必搓揉至出筋啦。就好像普通手做麵包那般,又要搓又要摔那種揉法。

Thursday, February 4, 2016

4/2/2016 (Thu) 芒果百香果優格溶豆


蕃薯蔴辮
材料:蕃薯泥100克,木薯粉25克。
做法:
1)兩樣材料搓成團,分成6-8份。
2)每份搓成長條,對折扭轉成蔴辮。
3)熱鍋加油,煎至上色即可。

也可以用烤箱,160‘C度,15分鐘。


ABC Pasta with ABC Soup
Ingredients: 
Alphabets Pasta or any types of desired pasta, cook as per instructions 

My way of cooking to avoid mushy and soggy pasta and can last till dinner:~
1) I cook pasta as per instruction on packaging, 
2) drain away the hot water
3) soak pasta in a big bowl of ICE cold water for 30 seconds
4) drain away the cold water
5) add 1-2 tsp rice bran oil or olive oil to the pasta and mix well

for reheating:~
1) Just scoop out the pasta portion, steam for 5 mins.
2) Pour in the heated ABC Soup
3) Ready to serve~ 

ABC Soup
Ingredients :
1 chicken tight (ayam kampung)
1/2 carrot
1 potato
1 onion
1.5 litre water

Steps:
1) blanch the chicken tights in boiling water for 3-5 minutes
2) cut the carrot, potato and onion into small pieces.
3) Cook all ingredients in a big pot of water in high fire for 10 mins, then 2 hours in small fire.


芒果百香果優格溶豆
材料:
芒果百香果優格 60克 (也可以用任何口味的全脂優格)
嬰兒奶粉 40克 (如果沒有,全脂奶粉/玉米粉代替)
玉米粉 30克
蛋清/蛋白 100克 (3粒蛋)
細砂糖 5克 (如果用原味優格,糖可以用10克
白米醋/檸檬汁 幾滴(加蛋白中去腥和穩定蛋白泡泡)

做法:
1. 稱出適量優格 ,把奶粉和玉米粉與優格攪拌均勻後備用。

2. 蛋清在無水、無油清潔的容器中打發,當魚眼泡時加入細砂糖,打發至硬性發泡。很硬那種,拉出攪頭很短的尖那種。

3. 將優格糊與蛋白糊混合翻拌後,不需要過度攪拌,快手操作,提前預熱烤箱,我用100度左右就可以,記得鋪上矽膠墊哦!強烈推薦,以前我用烤紙,這幾次用的矽膠墊超級給力,裝入裱花袋中可用圓嘴或者我這種中號六齒擠出小饅頭或者小塔糖的形狀!

4.因為給寶寶吃就不要擠很大,小小顆很適合寶寶,所以就這個量,你可能也會擠兩盤以上,我是兩盤一起烤的,低溫烘烤用了60分鐘,中間有上下倒換一下烤盤,原則是不上色好看!

5.最後也可關閉烤箱,不拿出烤盤在裡面悶烤一下,當你的溶豆不容易從烘培紙上取下的時候,就是沒有烘烤透,需要延長時間。烤好後要密封儲存!此款小食不會很甜,很適合寶寶,入口即溶!

*小貼士*

1. 請根據自家烤箱溫度做調整,我的烤箱比較大,小烤箱的火力比較猛。要看著一下,以免糊掉。

2.不成形請根據以下兩點找原因:要么酸奶太稀,水分太多,要么攪拌過度消泡了!

3.從烤紙上取不下來要么烘焙時間不夠,還是軟的,要么烤過了,已經糊了!


video of making yogurt melts


Mango Passion Fruit Yogurt Melts
Ingredients
60g Full fat Mango Passion Fruit Yogurt (or using flavoured yogurt)
40g milk powder / baby formula milk powder
30g corn starch
100g egg white
5g castor sugar (If using plain yogurt, used 10g)
1/2 tsp lemon juice or vinegar

Steps:
1) Add milk powder and corn starch into the yogurt
2) add the lemon juice into egg white, beat the egg white with sugar till hard peak form
3) add 1/3 of the egg white into the yogurt mixture, mix well
4) add the yogurt mixture into the 2/3 of the egg white and fold well gently but quickly.
5) preheat oven at 120'C
6) put the mixture in a piping bag or plastic bag, cut a 0.7cm hole at the edge
7) Squeeze out mixture onto baking tray laid with non stick parchment paper
8) Bake at 100'C for 60mins or till the cookies easily be removed from the parchment paper
9) let the cookies sit in the oven for further 5-10mins is recommended.


Tuesday, February 2, 2016

2/2/2016 (Tue)40分鐘超軟牛奶麵包

I was a bit moody last night and refused to talk to anyone after I scolded my gal of passed motion on her pants. I felt very guilty of scolding her with loud voice and I choose to keep myself away from her and alone in my room. Whole night no voice out from me and my mood was extremely down due to few factors.

Tonight I have to cuddle my gal and give her happy smile to reimburse my fault....


40 mins method soft milk bun
Ingredients:
1 teaspoon instant yeast
1 tablespoon brown sugar
1 tablespoon caster sugar
1/3 cup warm milk
2 tablespoon olive oil
1 cup bread flour (can add more flour if too wet and can't form a dough)
1/2 teaspoon salt
1 tablespoon beaten egg

remaining egg add in some milk for egg wash

filling:
some cheddar cheese
some raisin 

Steps:
1. Add instant yeast, brown sugar, caster sugar, olive oil, milk into a mixing bowl, stirred it and rest aside for 10-15 mins till you will see floating foam as showed in the picture.
2. Mix in flour, salt and 1 tablespoon of beaten egg then use a spatula to fold and mix well the mixture into a dough form.
3. Then use electric kneading hook to knead for about 5-10 mins or till well combined.
4. Roll, cut and shape into 8 small doughs.
5. Grease little oil on the baking pan and line the dough in, cover with wet cloth and let it proof for about 10 mins. ( If sufficient time, let it proof for 20mins)
6. Brush egg wash onto the bread.
7. Bake at pre heat oven at 180 degrees C for 10mins (baking time vary for different oven)

shaping in progress....


40分鐘超軟牛奶麵包
材料:
1茶匙 速發乾酵母
1湯匙 紅糖
1湯匙 砂糖
1/3杯 溫牛奶(大約40度)
2湯匙 橄欖油/玉米油/米糠油
1杯 高筋麵粉 (如果太濕,可以慢慢加一點麵粉)
1/8茶匙 海鹽 (我只放一咪咪而已)
1湯匙 全蛋液

塗面:
剩下的雞蛋加入一些牛奶蛋液

內陷:
(不放也可,還是很好吃的)
葡萄乾 適量
車達干酪 適量

做法:
1)首先,把鮮奶加熱。在一個大的鋼盆,加入酵母,紅糖,砂糖,橄欖油和牛奶。用湯匙攪拌均勻後,蓋著發酵10-15分鐘,會有很多泡沫在表面。
2)將麵粉,海鹽和1湯匙蛋液加入發酵了的牛奶中,然後拌勻搓成麵團。
3)然後用電動揉捏鉤揉約5-10分鐘。 (沒有電動攪拌器的話,用手搓揉10分鐘也可以)
4)把麵團分割成6個小麵團,滾圓或造型。
5)放在鋪了不粘布/紙的烤盤上,放入烤箱並加一碗熱水在內幫助發酵。大概發酵10分鐘。(如果時間充裕,20分鐘也可)
6)把烤盤取出,開始預熱烤箱180‘C並用蛋液刷在麵包表面。
7)烘烤10分鐘即可。 (烘烤時間因不同烤箱而異)

***發酵10-15分鐘
***搓揉5-10分鐘
***發酵10分鐘
***烘烤10分鐘

How soft am I ????
我有多柔軟啊? ? ?

Mushroom chicken quinoa porridge


Barley Drink for teatime

Monday, February 1, 2016

1Feb2016 (Mon) 寶寶版德國酥餅

Banana Cake by my mom
Rice cooker method


Lunch and Dinner
Ten Grains Ramen+steamed chicken drumstick+sweet corn soup

BABY Melt-in-mouth German Cookies 
(by Yen Li)
Ingredients:
42g unsalted butter
20g icing sugar, sifted
90g potato starch
30g superfine flour 
1/2 tsp vanilla extract (optional)
1 egg yolk

Steps:

1. Mix butter and icing sugar till well combined.
2. add in vanilla extract, mix well.
3. add in egg yolk, mix well.
4. Sieve in potato starch, mix well.
 5. sieve in flour, mix well.
6. Put the mixture into a piping bag with a icing nozzle.
7. squeeze out rings or flowers on the non-stick baking sheet.
8. bake at preheated oven of 150'C for 20mins.

寶寶版德國酥餅
(適合一歲以上的寶寶)
材料:
無鹽奶油 42克 (室溫軟化)
糖粉 20克
香草萃取精華 1/2茶匙 (可以不加)
蛋黃一顆
馬鈴薯澱粉/太白粉(potato starch) 90克
低筋麵粉 30克

做法:
1)無鹽奶油加糖粉,攪拌均勻。
2)加入香草萃取精華,拌勻。
3)加入蛋黃,拌勻。
4)篩入太白粉,拌勻。 (切勿過度攪拌,成無干粉的狀態即可)
5)篩入低筋麵粉,拌勻。
6)把麵糊舀入擠花袋(裡面裝了擠花嘴的)。
7)把麵糊擠出圈圈或一堆在不粘烤布/紙上。
8)送進已經預熱150度的烤箱,中層, 烘烤大約20分鐘即可。

時間和溫度可依自家烤箱調整。
***特別注意這個酥餅不需要烤至焦黃色,出來的成品應該是淡淡的黃色,所以烘烤時要多注意以免烤焦