knead-less Cheese Bread Sticks
Ingredients
150g Milk
200g high protein flour
100g wholemeal flour
40g muscovado sugar or any sugar
40g milk powder
1 egg
1 tsp instant dry yeast
35g unsalted butter (room temperature) / olive oil
For Topping:
grated cheddar cheese
olive oil / rice bran oil
olive oil / rice bran oil
Steps:
1) mix all ingredients in a big bowl. Mix till combine and soft dough is formed (I spent less than 1 min)
2) cover bowl with cling wrap, leave a small hole for air flow.
3) keep in the fridge 2 hours onwards, after 2 hours, you may take out and shape any time.
4) take out the wet dough and place on a greased mat, I use some oil to grease my hands too.
P/s: If you do not wish to make too many bread sticks at once, you may divide the dough into 3 portions and keep 2 portions in the freezer for next use within 1 week
P/s: If you do not wish to make too many bread sticks at once, you may divide the dough into 3 portions and keep 2 portions in the freezer for next use within 1 week
5) Roll and form dough into rectangular shape, brush a layer of olive oil on the dough surface, then fold in 1/3 of the dough and fold again (pic 1). Repeat rolling flat and fold again. (pic 1)
6) Cover dough with cling wrap, rest for 10 minutes. After that, roll dough into 3mm flat dough, use knife to cut out 1cm width sticks. (pic2)
6) Cover dough with cling wrap, rest for 10 minutes. After that, roll dough into 3mm flat dough, use knife to cut out 1cm width sticks. (pic2)
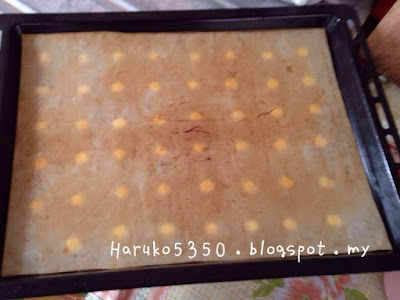
7) coat each sticks with grated cheddar cheese, use fingers to slightly adjust the cheese till evenly. Place the bread sticks on non-stick sheet laid on baking tray.
8) put the baking tray inside the oven (power off) and let it proof for 30mins. You may place a bowl of hot water inside the oven to help the proofing process better.
9) after 25mins, Remove the baking tray from the oven. Pre-heat the oven at 190'C for 5 mins.
10) Bake the bread sticks for 10 minutes, remove tray, change tray direction and put again on the top rack in the oven, bake for another 1-2 minutes or till light golden brown.
P/S: This morning after taking out the dough from the fridge, after 10 mins, I divided the dough into 3 portions. 1 portion made into 6 mini sized bun + 2 cheese sticks and 2 portions kept in the freezer for next use within 1 week.

圖1 / pic1

圖2 / pic2

圖3 / pic3
免揉奶酪酥麵包條
材料:牛奶150g,速發乾酵母1小匙,高筋麵粉200g,全麥麵粉100g, 有機蔗糖/細砂糖40克,奶粉40克,雞蛋1顆,無鹽奶油35g(可用橄欖油替代)
準備:
切達奶酪絲適量
橄欖油/米糠油適量
準備:
切達奶酪絲適量
橄欖油/米糠油適量
做法:
1. 奶油放室溫軟化
2. 將所有材料放入鋼盆內攪拌均勻
3. 放入樂扣盒中但不要蓋緊,讓空氣可進入
4. 放入冷藏兩小時到一天,隨時都可以拿出來整形(冷藏越久甜味越淡)
5. 將冰箱中的麵糰拿出來整型,麵糰很溼軟,可以多撒些麵並在桌子上抹油,也在雙手抹些油。
(如果不想一次做太多的分量,可以把麵團分成3份。然後把另2份存放在冷凍庫,以便在1週內使用。)
6. 把麵糰擀成長方形,抹上一層橄欖油,然後對折麵團(如圖1),再擀平,再重複對折麵糰(如圖1)。
7. 用保鮮紙覆蓋,休麵糰10分鐘。然後把麵團擀平成3厘米薄,用刀切成1公分的細條。 (如圖2)
8. 將切好的細條沾上奶酪絲,用手稍微整理均勻後擺放在烤盤上,如果細條較短/較厚,可以用手慢慢的抻長一些。 (如圖3)
9. 把烤盤和一碗熱水一起送進沒開電源的烤箱裡發酵約30分鐘或至雙倍大。
10. 把烤盤和熱水取出烤箱,開啟烤箱電源預熱190度C。
11. 放入已經預熱至190度c的烤箱中(中層),烘烤10分鐘,取出烤盤轉換方向,再放入烤箱最上層,繼續烘烤1-2 分鐘至表面上色即可。
1. 奶油放室溫軟化
2. 將所有材料放入鋼盆內攪拌均勻
3. 放入樂扣盒中但不要蓋緊,讓空氣可進入
4. 放入冷藏兩小時到一天,隨時都可以拿出來整形(冷藏越久甜味越淡)
5. 將冰箱中的麵糰拿出來整型,麵糰很溼軟,可以多撒些麵並在桌子上抹油,也在雙手抹些油。
(如果不想一次做太多的分量,可以把麵團分成3份。然後把另2份存放在冷凍庫,以便在1週內使用。)
6. 把麵糰擀成長方形,抹上一層橄欖油,然後對折麵團(如圖1),再擀平,再重複對折麵糰(如圖1)。
7. 用保鮮紙覆蓋,休麵糰10分鐘。然後把麵團擀平成3厘米薄,用刀切成1公分的細條。 (如圖2)
8. 將切好的細條沾上奶酪絲,用手稍微整理均勻後擺放在烤盤上,如果細條較短/較厚,可以用手慢慢的抻長一些。 (如圖3)
9. 把烤盤和一碗熱水一起送進沒開電源的烤箱裡發酵約30分鐘或至雙倍大。
10. 把烤盤和熱水取出烤箱,開啟烤箱電源預熱190度C。
11. 放入已經預熱至190度c的烤箱中(中層),烘烤10分鐘,取出烤盤轉換方向,再放入烤箱最上層,繼續烘烤1-2 分鐘至表面上色即可。
備註:今早從冰箱裡取出麵團後,休麵團 10分鐘後,我把麵團分成3份。 1份做成6個迷你的小麵包+2條麵包棒和把另2份存放在冷凍庫,以便在1週內使用。

Brown Rice Spinach Pancake
Ingredients :
1 bowl of cooked brown rice (children's bowl)
1 egg
40g cooked pumpkin puree
1 bowl of baby spinach (children's bowl, chopped)
Dash of pepper powder
pinch of salt
Steps:
1) mix well all ingredients and scoop a tbsp mixture onto non stick pan and panfry till both sides are cooked.

Apple Beetroot Soup
Ingredients:
1 apple
1 onion
1 beetroot
1 chicken tight

Pear Luo Hon Guo Drinks
Ingredients
1 Luo Hon Guo
1 golden pear
handful of dried winter melon
1 honey date
2-3 litres water